I roasted a duck!
Thanks to Martha Stewart's instructions, it wasn't all that difficult. The results were good.. and I think with a little tweaking it could be great. I'll definitely be trying this again some time. I've decided to post this as a step-by-step photo guide to cooking a duck, in case anyone else out there is interested in trying it.
 |
| You'll want to prevent splatters from hitting the bottom of your oven - I wrapped the entire bottom rack in aluminum foil. Preheat the oven to 425 F. |
 |
| You'll need a roasting pan and a rack. If you've been poor and/or cheap for so long that you don't own a roasting pan, you can fashion "walls" from foil to put around a 9x13" baking pan. |
 |
| Duck! |
 |
| Cut off any big chunks of fat around both of the openings. I put them in the bottom of the pan so the fat would render out. If your duck includes any organs, you can save them, or throw them in the pan, too. Mine didn't have any. =[ |
 |
| Remove the wing tips. Otherwise they'll burn. I threw them in the pan, because Martha told me to. |
 |
| Poke little holes all over the bird (except the thighs/legs and wings) with a small knife. Top and bottom. Holding the camera still with only my left hand is clearly difficult for me. |
 |
| Make shallow criss-crossing slashes on the breast side, cutting into the fat but not into the meat below. |
 |
| Preferably, yours would look more like Martha's and less like mine. |
 |
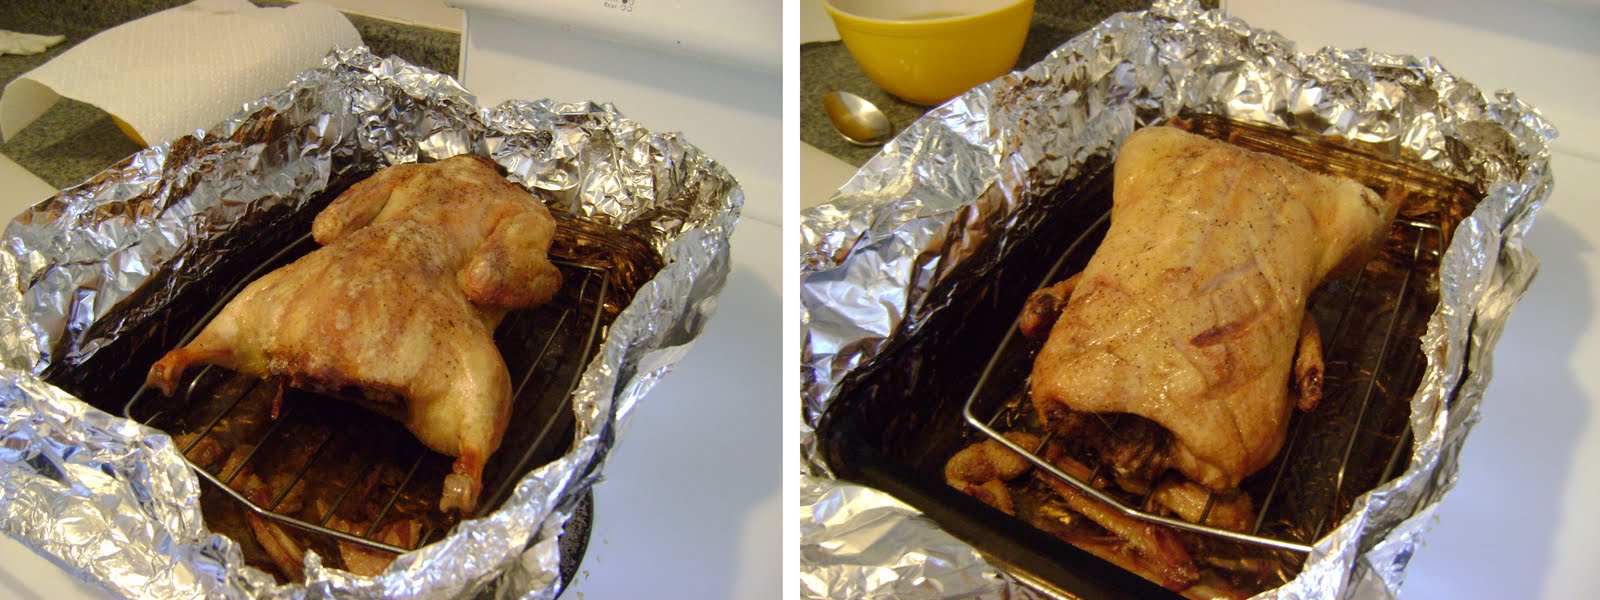
| Season with salt and pepper, inside and out. Roast breast-side-up for 45 minutes (for a 5-6 lb duck - adjust for larger or smaller). |
 |
| After 45 minutes, flip the duck over. You may want to pour out some of the fat in the bottom of the pan (and save it, of course). Roast another 45 minutes, breast-side-down. |
|
 |
| After that 45 minutes, flip it back. Continue roasting breast-side-up until the duck reaches 165 F. This is where mine got tricky - it was already just a degree or two short of that, and Husband wasn't gonna be home from work for another 45 minutes. Yikes. |
 |
| So I got creative. Wrapped the whole pan in foil and left it at room temp for a while. |
 |
| When it was almost dinner time, I turned on the broiler to crisp up the skin and make sure it was nice and hot. It may have gotten a little too crispy in some spots. |
 |
| It still looked very pretty up close, though. |
Overall, for my 4.4 lb duck, I think I could have gone with 30 minutes for each roasting time. It was slightly overcooked, but I think all the fat helped keep it from drying out. Speaking of fat, I got OVER A CUP OF FAT from this one duck that I'll use for cooking various things in the future. Yay!
To go with it, I made
Tyler Florence's Parmesan-Roasted Green Beans. The idea is that the cheese melts down onto the baking sheet and forms crispy crackery pieces... just like when you bake cheese on parchment paper to make cheese crisps/chips/crackers. If you don't know what I'm talking about,
Joyful Abode has excellent instructions, and I promise it's not just for low carbers.
 |
| This really couldn't be simpler. |
 |
| It even looks pretty before it's cooked! |
 |
| I gave this 12 minutes, and it could have used more time, since not all the cheese was crunchy. But the stuff around the edges was browning so I took it out anyway. I don't think there's a way to get it to crisp evenly. |
 |
| After scooping up the crunchy cheese pieces and tossing it all together. |
I also served this with a cucumber-tomato salad, inspired by
the one at Joyful Abode. This is the second time I've mentioned her in one post! If you read this, FNW, congrats on the new baby. <3
 |
| Dinner! |


No comments:
Post a Comment